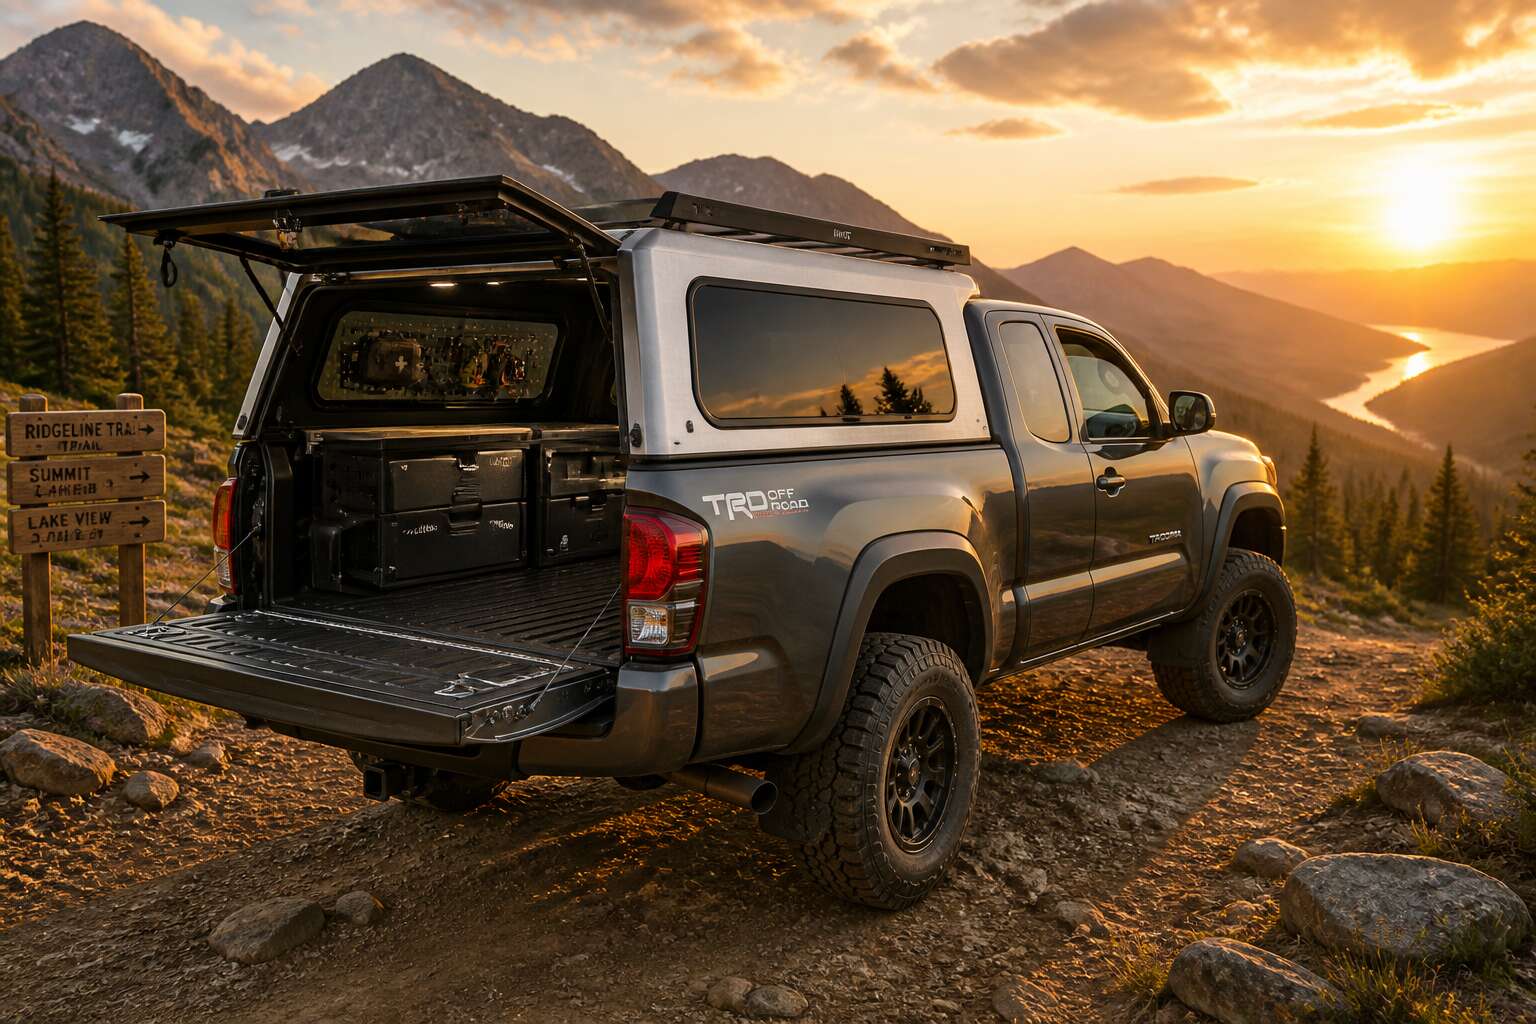
Why Choose an Aluminium Canopy for Your Extra Cab Ute
Enhanced Security and Weather Protection
Across South Africa, an open load bed is a security risk. Tools disappear overnight. Cargo deteriorates under harsh sun and rain. Extra cab aluminium canopies change this. They provide a lockable, enclosed space that protects your load.
- Locking mechanisms that resist prying
- Opaque panels that conceal valuables
- Rigid aluminium that takes punishment
Weather protection works the same way. A canopy blocks moisture, dust, and UV rays. Your gear stays dry through a Highveld thunderstorm and cool under the Karoo sun. Aluminium resists corrosion, which matters on salted coastal roads. You stop worrying about your equipment and get on with your work.
Improved Fuel Efficiency Through Aerodynamics
Air is heavier than most drivers realise. At 120 km/h, an open load bed creates a pocket of high-pressure air that drags against the truck and forces the engine to work harder. Fitting extra cab aluminium canopies changes that completely.
The canopy redirects airflow over the cab and off the rear, eliminating the turbulent wake that forms behind an open bed. With less resistance, the engine holds cruising speed on less fuel. Long highway stretches between Pretoria and Durban show the difference most clearly.
- Reduced wind drag at highway speeds
- Lower fuel consumption on long trips
- Better stability when overtaking trucks
Each litre saved matters when diesel prices keep shifting. Over a year of daily driving, extra cab aluminium canopies often repay their cost through reduced fuel stops alone.
Rigid Build for Heavy-Duty Use
There are times when a bakkie is not a vehicle but a tool of the trade. On a worksite in Mpumalanga or a farm in the Free State, the load bay takes a beating that would buckle a lesser structure. This is where the construction of extra cab aluminium canopies separates the practical from the merely decorative. A canopy that looks good in a showroom but flexes under pressure is a liability. The rigid build is the defining factor for heavy-duty use, and it is measurable in the metal itself.
The strength begins with the frame. Extruded aluminium sections, engineered with internal bracing, create a skeleton that resists torsion. When you traverse a rutted gravel road with a half-tonne of equipment shifting in the back, the canopy needs to hold its shape. A flimsy unit will creak, flex, and eventually fatigue, compromising the seals and the security of your load. A well-built unit sits square and silent, transferring stress through the chassis instead of absorbing it. This is not about aesthetics. It is about mechanical integrity.
– One solid unit, not bolted together from thin sheets
– Reinforced corners that do not separate under vibration
– Thick base plates that distribute weight evenly onto the load bin
The materials matter as much as the design. Marine-grade aluminium alloy, with its higher copper and magnesium content, offers superior resistance to the corrosive mix of rain, road salt, and the acidic dust kicked up on rural routes. Cheaper alloys might save weight, but they sacrifice longevity. For a rig that earns its keep, the choice is clear. Extra cab aluminium canopies built for heavy-duty use are an investment in the vehicle’s lifespan, protecting the load bin from dents, scratches, and the relentless erosion of the elements. The canopy acts as the first line of defence for the entire rear structure.
Corrosion Resistance and Low Upkeep
Coastal air carries salt that eats through painted steel in months. Extra cab aluminium canopies shrug off that assault because aluminium oxidises into a protective patina. I have seen a canopy sit untouched for five years and still pass a magnet test with zero corrosion underneath. No sanding, no priming, no repainting. That is the whole maintenance schedule!
- No rust to cut out
- No seals degrading from corrosion
- No annual coating expenses
The low upkeep is not a marketing claim. It is a physical property of the alloy used in quality builds. For a bakkie that works for a living, this saves days of downtime over the vehicle’s life.
Key Measurements and Compatibility for Extra Cab Fitment
Understanding Tray Dimensions and Canopy Base
A 10 mm discrepancy in the canopy base can compromise the entire fitment. Extra cab aluminium canopies demand precise alignment with the load bed. Measure the tray’s internal width, length, and height before ordering. These three dimensions determine the canopy’s footprint. Get one wrong, and you face costly modifications.
Consider these measurements when assessing compatibility:
- The internal width between the tray’s side walls.
- The overall length from the cab bulkhead to the tailgate.
- The height of the load bed sides or stakes.
Each measurement influences how the canopy base sits. The base must match the tray’s top rail profile exactly. A flared canopy base will not seal properly on a straight-sided tray. We see these mismatches more often than we should, and they always trace back to skipped steps.
Matching the Cab Profile and Window Cutouts
The cab profile of a bakkie rarely forms a straight vertical line. The canopy must follow the slope of the windscreen and the curve of the roofline, or gaps will let in dust and road spray. Window cutouts add another layer of precision, since the opening must align with the rear window of the cab.
Consider these points when assessing cab compatibility:
- Measure the cab width at the top, middle, and bottom of the rear window
- Record the angle of the cab’s rearward slope
- Check the distance from the roofline to the top edge of the window
A canopy built for a generic profile will not sit flush against a specific cab. Extra cab aluminium canopies are manufactured for exact fitment, but small variations in cab shape between models demand attention. When the profile and cutouts are wrong, the canopy becomes a source of vibration and wind noise at highway speed.
Internal Headroom and Access Considerations
There is an old farming saying that a bakkie works hardest in the three feet behind the driver’s head. That space, the extra cab’s rear compartment, becomes either a cramped afterthought or a genuinely usable room, and the canopy determines which one you get. The measurements that matter most are the ones you cannot see from the outside, the internal headroom above the load floor and the clearance between the canopy roof and the cab’s rear window frame.
Take these measurements before committing to a canopy model:
- Measure the vertical height from the load bed floor to the underside of the canopy roof, then subtract the height of any drawer systems or storage boxes you plan to install.
- Record the distance from the rear window sill to the canopy’s front wall to confirm you can reach through the access hatch without contorting your shoulder.
- Check the ceiling clearance at the front edge, where the canopy curves to meet the cab, since this point is typically 30 to 50 millimetres lower than the centre of the roof.
Headroom in an extra cab is a compromise by design. The cab itself is shorter than a double cab, which forces the canopy’s front bulkhead to angle forward more sharply. A 6-foot-tall person will find the difference between a 1150 millimetre and a 1250 millimetre internal height meaningful when loading a toolbox or reaching for a fuel can. Short people, meanwhile, worry less about the roof and more about the access door size. Entry hatches on extra cab aluminium canopies vary from narrow side slots to full-width rear openings, and that choice affects how easily you can slide a heavy item across the bed.
The real test is not the total volume, but the usable volume. A canopy that looks spacious on paper can have a roof brace running directly above the access hatch, or a diagonal reinforcement that eats into the corner where you want to stand. When I fit canopies for clients, I always ask them to bring the tallest item they regularly carry, whether that is a jack, a fridge, or a bag of cattle feed. If it clears the roof with your hand flat on top, the extra cab aluminium canopies will serve you well for a decade. If it touches, you will curse that canopy every single time you load up.
Locking Mechanisms and Tailgate Integration
The third door opens with a sigh, a sound of precision engineering rather than a compromise. The fitment of an extra cab aluminium canopy demands a level of tolerance that mirrors the vehicle’s own construction, a marriage of metal and design. Compatibility here is not a suggestion, it is a prerequisite. The canopy’s base must align with the load bed’s rails to the millimetre, and the cab’s window cutout must match the canopy’s front panel with the seam of a ghost’s whisper.
– Verify the canopy’s front bulkhead angle matches the cab’s rear window rake.
– Confirm the load bed’s tie-down points remain accessible after the canopy is installed.
– Check the canopy’s rubber gasket compresses evenly along the entire cab interface.
The locking mechanisms on these canopies are a study in quiet ruthlessness. A simple central locking system that ties into the vehicle’s own remote offers a layer of convenience that feels almost decadent. Yet, the real work happens at the tailgate. The integration must allow for a full swing of the door while maintaining a seal that keeps out the red dust of the Karoo. A poorly integrated tailgate lock will rattle at speed and wear out the latch geometry within a season. The tension is set so the handle turns with a deliberate force, a solid clunk that speaks of security. The tailgate itself, when dropped, should sit flush with the canopy’s rear frame, allowing for a seamless loading plane. You will find that the best systems use a rod mechanism that pulls the tailgate tight against the rubber seal, preventing the ingress of water and the persistent whine of wind noise. This is the quiet architecture of a well-fitted canopy, a system where every lever and latch has a purpose, and every closing action feels inevitable.
Weight Distribution and Load Rating
Numbers tell the truth before the first trip. For extra cab aluminium canopies, the critical figures are the tare weight, the gross vehicle mass, and the front bulkhead angle. If the canopy’s centre of gravity sits behind the rear axle, the steering lightens at exactly the wrong moment.
- Measure the distance between the load bed rails at three points, front, centre, and rear.
- Confirm the canopy’s weight against the manufacturer’s stated payload.
- Recalculate the GVM with the canopy and gear fitted.
A 120 kg aluminium unit may save fuel, but a heavier steel canopy with a higher load rating serves a working bakkie better. Weigh the vehicle on a public scale. The difference between axle weights reveals the true distribution. Extra cab aluminium canopies have shorter wheelbases, so the rear overhang multiplies every kilogram of load. Get this wrong and the handling becomes unpredictable. Get it right and the canopy disappears into the drive.
Step-by-Step Installation Guide for Aluminium Canopies
Pre-Installation Preparation and Tools Required
Rushing the prep work is the fastest way to turn a straightforward fitment into a frustrating afternoon. Before you touch the extra cab aluminium canopies, park on level ground and clear the tray completely. Compare the packing list against the hardware bag; missing bolts are easier to replace before you start than after.
I always tell owners to work on a dry surface. Dust and moisture compromise the seal. Here is the essential tool kit for this job:
- Socket set with extensions
- Torque wrench
- Silicone sealant and applicator
- Drill with metal bits
Gather these items and inspect the canopy’s rubber gaskets. Test the locking points by hand. This preparation ensures the fitment goes smoothly, saving you time and protecting the aluminium from scratches.
Lifting and Seating the Canopy Correctly
A canopy that is lifted off-centre will fight every turn of the bolt. That is the cold truth of this stage. You are not simply placing a shell onto a tray; you are aligning a precision component that must settle without strain. Enlist a second person, ideally a third, to handle the weight. The extra cab aluminium canopies are deceptive in their bulk, so use a padded spreader bar across the front and rear pillars to avoid denting the frame.
Lift with your legs, not your back, and guide the unit forward until the front edge kisses the cab’s rubber seal. This is where patience pays off. Do not slam it down. Let the canopy hover an inch above the tray, then lower it slowly, feeling for the locating pins to engage their slots. Before you apply any pressure, check these three points:
– The gasket sits flush against the tray lip on both sides.
– The front window aligns squarely with the cab’s back glass.
– The rear door swings free without catching the tailgate.
Only then can you lower the canopy fully. A final, gentle rock from side to side will help it seat. If you feel any resistance, lift and reposition, never force it. A proper seat means the rubber compresses evenly, which locks out dust and moisture. Once it touches down, the weight should rest on the entire perimeter, not just the corners. That is the moment you know the fitment is correct.
Drilling and Securing Bolts Without Damage
Drilling is where most canopies acquire their first scratches. The tray’s pre-drilled holes rarely match the mounting brackets on extra cab aluminium canopies. Use a centre punch to mark each location, then a step drill bit to avoid distorting the alloy. Start with a pilot hole and enlarge it slowly. Let the drill do the work; forcing the bit will tear the skin.
Mask off the surrounding area with tape to protect the powder coat. Clamp a wooden block under the tray to stop flex. On extra cab aluminium canopies, each bolt gets a stainless steel washer and a rubber gasket. Tighten the bolts in a criss-cross pattern and use a torque wrench set to the manufacturer’s specification. The final squeeze should compress the gasket evenly, not crush it.
- Deburr every hole with a countersink tool before bolting
- Apply anti-seize to the threads to prevent galvanic corrosion
Applying Sealant and Weatherproofing
A common oversight during installation is neglecting the seal between the canopy and the tray rails. Water finds the smallest path. A bead of polyurethane sealant, not silicone, forms the primary defence against dust and moisture ingress. Silicone degrades under UV light and can corrode aluminium over time. Use a high-quality, paintable polyurethane product specifically designed for automotive glazing.
Before applying the sealant, wipe the mating surfaces with a solvent-based cleaner to remove all traces of grease and wax. Apply a continuous 8mm bead along the top edge of the tray rail. For extra cab aluminium canopies, pay close attention to the corners and the tailgate area, where gaps are common. Press the canopy down into the sealant slowly, allowing the material to squeeze out evenly.
Here is the correct sequence for the sealant process:
1. Apply the bead to the tray, not the canopy, for better control.
2. Use a gloved finger or a plastic spreader to tool the bead after installation.
3. Remove the excess sealant immediately with mineral turpentine before it cures.
After tooling, inspect the entire seam for voids or thin spots. Fill any gaps with a secondary application using a caulking gun with a fine nozzle. The goal is a complete, unbroken barrier. Sealant used correctly on extra cab aluminium canopies also dampens vibration between the two surfaces, reducing cabin noise.
Consider the sealing of the bolt heads as well. A dab of sealant over each bolt head, applied after torquing, prevents water from tracking down the threads and into the tray. Let the sealant cure fully for 24 hours before washing the vehicle or driving in heavy rain. This final step converts a simple mechanical fit into a weathertight, dustproof installation that preserves the condition of your cargo and the integrity of the tray itself.
Wiring for Interior Lights and Brake Lights
Wiring must happen before the base seals down, not after. The wiring for extra cab aluminium canopies often gets ignored until the canopy is already bolted down, which forces you to lift it back off. The roof channel gives you a safe path for the interior lamp wire, but you need to respect the internal bracing. I only drill a new hole when no factory grommet exists, and I deburr the edge without exception.
The brake light connection shares the vehicle’s harness. My sequence is:
- Isolate the battery.
- Locate the tail light loom on the rear chassis.
- Splice in a converter for a separate indicator circuit.
Test every function before applying sealant. A single harness often carries both interior lights and brake lights on extra cab aluminium canopies, so a short test saves you from stripping the roof later. Clean the contacts, then close the system.
Maintenance and Cleaning Best Practices
Routine Cleaning and Protective Coatings
Routine cleaning keeps your canopy looking sharp for years. Use a pH neutral soap and soft sponge to avoid scratching the alloy’s protective oxide layer. Pay attention to crevices where dust and mud accumulate, especially after trips on gravel roads.
For long lasting shine, apply a marine grade wax or ceramic sealant designed for bare aluminium. This protects against Johannesburg’s harsh UV rays and coastal salt air.
- Dry the canopy before applying any product
- Work in shaded areas to prevent streaking
- Reapply every three months for optimal protection
Regular upkeep preserves both appearance and resale value of your extra cab aluminium canopies.
Inspecting Seals and Gaskets
The rubber seals around your extra cab aluminium canopies see constant abuse from ultraviolet light, road grime and temperature swings. A tiny crack or misalignment can invite dust and moisture into the cab, undermining the weatherproofing you rely on. Inspect the perimeter seals monthly, especially after long trips on corrugated roads where vibration shifts everything.
Check the gaskets around window cutouts and the tailgate interface. Run a finger along each edge to feel for hardening or tears. Pay attention to the corners, where stress concentrates.
Common issues to look for:
– Compression marks that indicate poor seating
– Brittle or flattened sections
– Gaps between the canopy and the bakkie bed
If you notice any weakness, replace the seal before it fails. Properly maintained seals keep your extra cab aluminium canopies weathertight for years.
Lubricating Locks and Hinges
Once the seals are sorted, turn your attention to the moving parts. The locks and hinges on extra cab aluminium canopies carry the weight of daily opening and closing, and without regular lubrication they grind down quickly. A dry latch sticks, and a stuck latch invites extra force.
Silicone based lubricant works well on hinge pins and the lock mechanism. Wipe away old grease first so the fresh product reaches the metal. Graphite powder suits the lock cylinder better than oil, as oil attracts dust.
- Hinge pins and brackets
- Lock bolt and striker plate
- Tailgate pivot points
These points take the harshest abuse, and neglected hardware soon develops a stiff action and visible wear.
Addressing Scratches and Minor Dents
Eight out of ten extra cab aluminium canopies carry a scratch or dent within the first year. It is not a defect. Aluminium oxidises fast, so a bare scratch turns chalky and white within weeks. That corrosion spreads under the coating and weakens the panel. The repair process begins with a mild solvent and a clean rag. Then you inspect the damage. Common trouble spots are:
- Roof ridges where branches scrape
- Side panels at the rear wheel arch
- The lower edge where the tailgate closes
Shallow scratches respond to fine sanding and polish. Dents need careful tapping with a rubber mallet or a professional dent puller. Timely intervention within a week preserves the original finish. Extra cab aluminium canopies are sturdy, but they are not invincible. They reward attention and punish neglect.
Long-Term Corrosion Prevention
Salt laden coastal air in Cape Town or the high humidity of Durban can test an aluminium canopy in ways a workshop manual cannot. Corrosion on extra cab aluminium canopies often begins invisibly, beneath a rubber seal or around a bolt hole, and surfaces only after the oxide has already undermined the panel.
A quarterly inspection matters more than any single cleaning product. Pay attention to the following:
- Drainage channels where water pools after rain
- Bare aluminium edges where the anodising has worn thin
- Areas where dissimilar metals contact the canopy
Use a pH neutral cleaner and a soft brush to lift trapped grit. Rinse thoroughly and let the canopy dry completely before reapplying a protective wax. This routine, repeated through the seasons, prevents oxidation from taking hold and preserves the structural integrity of extra cab aluminium canopies.
Seasonal Checks and Storage Tips
Proper maintenance is a pact you make with time, and extra cab aluminium canopies reward those who keep it. The seasonal shift from Highveld thunderstorms to the Karoo’s dust-laden blows means the environment changes its attack plan quarterly, so yours should too. One critical habit is checking the seals around the windows and the rear door. A seal that feels brittle after a winter of UV exposure will crack without warning, letting fine red dust paint a mural across your cargo. This is precisely the kind of wear that a pre-spring inspection catches, saving you from a deep clean of a sleeping bag that seems to have sprouted its own desert ecosystem.
A practical checklist for your seasonal sweep includes several sharp points of focus. These are the spots where negligence usually shows its hand first, and looking at them while the light is good saves you from a headache later:
– Open and close every locking mechamism to feel for a gritty resistance that suggests debris inside.
– Run a finger along the underside of the canopy’s lip to check for grit that has been silently grinding the paint.
– Wipe the internal roof lining for condensation marks, which point to a ventilation problem rather than leaking water.
– Shake the canopy slightly to detect any loosening in the clamp system.
When you park your bakkie for an extended period, treat the canopy as a specimen in a controlled laboratory. A common error is covering the vehicle with a tarp that flops against the roof, creating a micro-abrasion zone that leaves cloudy patches on the aluminium. Instead of a tarp, you can use a layer of linen, which allows for airflow while preventing the plastic from touching the surface. For the interior, keep a small container of moisture-absorbing silica gel in the corner of the load bay to stop rust from forming on any steel tools. This prevents the buildup of a fine layer of damp that encourages mildew on any fabric. The final step is pulling the vehicle into a shaded area, not to protect the canopy, but to prevent the differential of temperature between the black plastic trim and the alloy from creating a stress condition. This habit of thoughtful, patient attention is what carries extra cab aluminium canopies through years of service, looking as neat as the day the sealant first cured. And come the next rainy season, you will have earned the right to simply look at it and appreciate the work held at bay, instead of tackling a restoration project.
Customisation and Accessory Options
Roof Racks and Load-Strap Solutions
Roof racks extend the function of an extra cab aluminium canopy. The mounting points on most extra cab aluminium canopies accept standard crossbars, so you can install a roof rack without custom fabrication. This matters when you carry ladders, piping, or timber that will not fit in the load bed. For strap solutions, consider the anchor points. A proper load-strap solution keeps cargo from shifting, which protects your goods and other road users.
Some owners prefer a minimal setup: two crossbars and a set of ratchet straps. Others want a full perimeter rack with integrated tie-down rails. Either way, the aluminium construction makes attachment straightforward. You are not fighting rust or seized bolts. Popular additions include:
- Ladder clamps for roof access
- Shovel holders for site work
- Light brackets for night operations
A well-organised canopy signals professionalism. It suggests you respect your equipment, your cargo, and the people sharing the road with you.
Drawer Systems and Internal Organisation
Most owners overlook the space beneath the canopy’s roofline. That void becomes prime real estate with the right drawer system. For extra cab aluminium canopies, internal organisation transforms a bare tray into a mobile workshop. Sliding drawers keep tools accessible without unloading the entire bed. A sturdy divider separates wet gear from dry cargo.
Consider these additions:
- Full-extension drawer runners for heavy loads
- Lockable compartments for valuables
- Removable shelving for flexible storage
Each component mounts directly to the canopy’s aluminium structure. No welding required. You simply bolt, adjust, and secure. The result is a clean, orderly setup that saves time on every job.
Sliding Windows and Mesh Screens
Most factory windows on extra cab aluminium canopies rattle within a year. I have seen it happen on more than a few work bakkies. The fix is a custom sliding window with a mesh screen built into the track, and it makes a real difference.
The sliding window on an extra cab aluminium canopy changes how air moves through the tray on a hot Karoo afternoon. A mesh screen slides alongside it, keeping dust and insects out while the window stays cracked. That combination turns the canopy into a shaded observation point during a break, or a secure shell when the wind picks up.
Customisation options for extra cab aluminium canopies include different mesh types, from fine fibreglass to galvanised steel. Each one affects visibility and airflow. Some owners add a lockable slider with a security screen behind it. Others fit a tinted pane for glare reduction.
Popular additions include:
– Sliding mesh panels that retract into the wall
– Tinted glass replacements
– Adjustable window stays with multiple positions
Each choice changes how the canopy breathes and how secure it feels.
Exterior Paint Matching and Line-X Coating
The factory finish on many extra cab aluminium canopies looks fine in the showroom, but it rarely survives the first Namibian gravel road. Paint matching separates a canopy that looks bolted on from one that looks factory built. Most suppliers use a two-stage urethane paint system, which bonds to the aluminium substrate better than single-stage enamel. The paint code should come from your bakkie’s VIN plate, not a visual match under fluorescent lighting.
Line-X coating is a spray-on polyurethane layer that absorbs impact instead of deflecting it. For extra cab aluminium canopies, a Line-X treatment on the exterior or tray floor eliminates the hollow, metallic ring that aluminium panels make when hail hits. The matte texture also hides scratches and stone chips, keeping resale value intact. Owners who combine colour-matched exterior with a Line-X interior get the protection of Line-X where it matters and a factory-matched look where it shows.
Light Bars and Auxiliary Mounts
Night driving on a gravel road exposes every weakness in your setup. The factory headlights only reach so far. A light bar mounted on the canopy changes that. But the mounting point matters more than the lumen count. For extra cab aluminium canopies, the roof or the rear pillar offers the stiffest anchor. Flimsy brackets create vibration that ruins the beam pattern. Consider these mounting options:
- Roof channel mounts that bolt into the aluminium extrusion
- Side pillar brackets that clear the canopy door swing
Auxiliary mounts for antennas or recovery boards should use the same reinforced points. A welder can add a steel insert if the aluminium skin feels thin. I always check the bracket’s gauge before drilling! A light bar is useless if it shakes loose at 120 km/h.



0 Comments