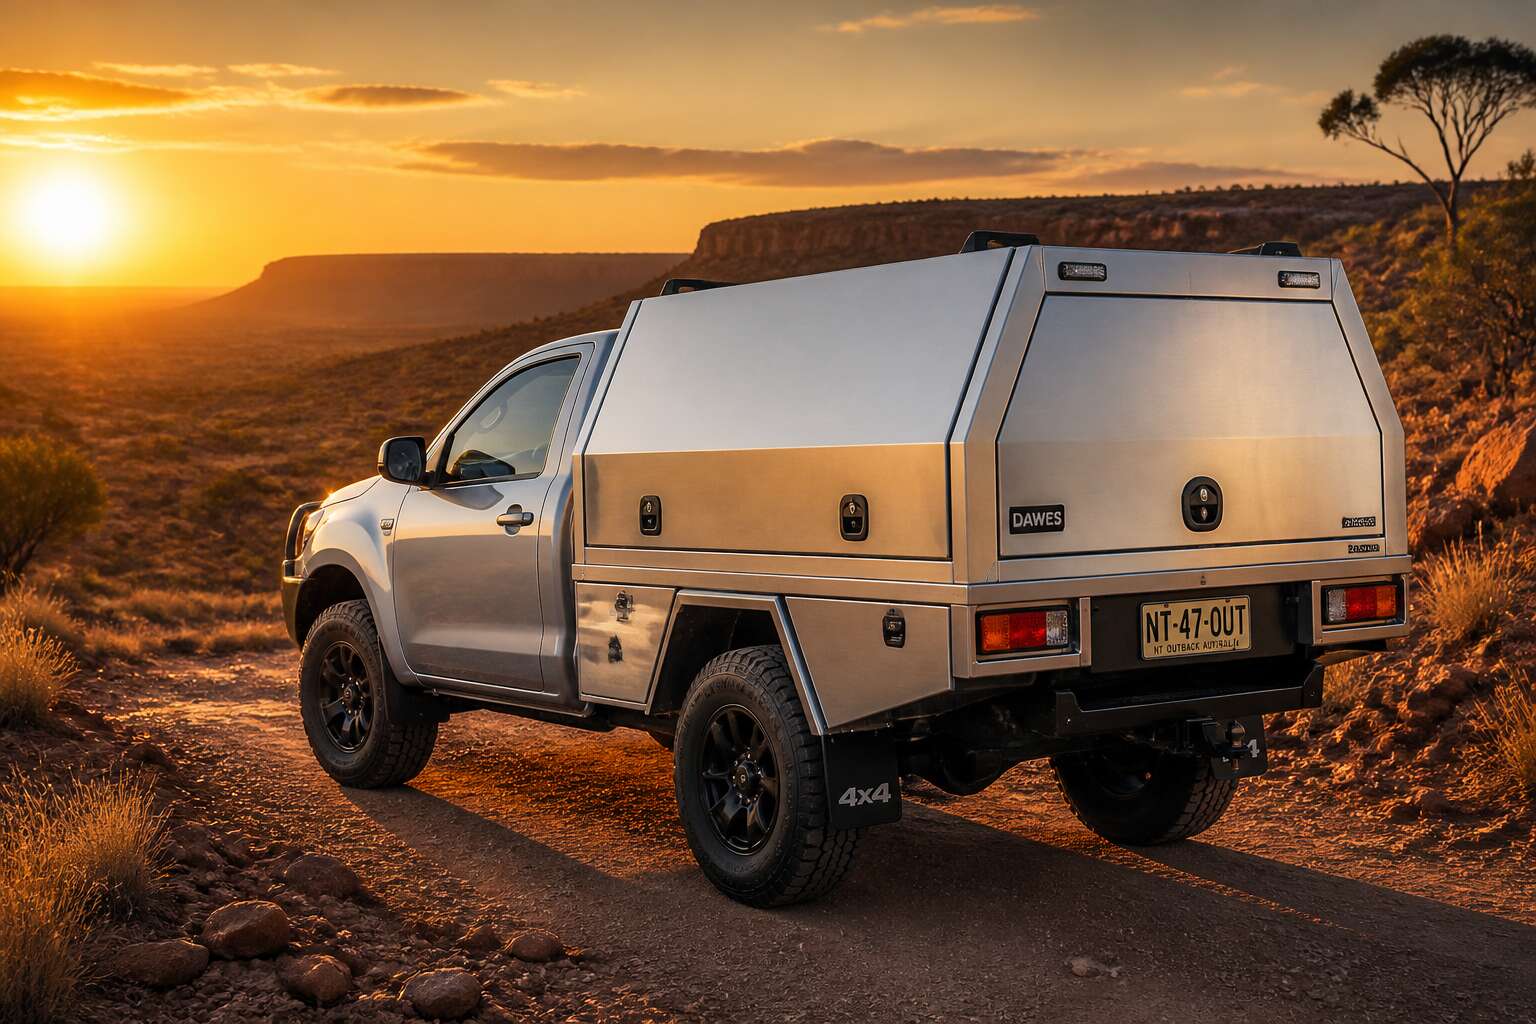
Why Upgrade Your Single-Cab Ute with an Aluminium Canopy
Enhanced Security and Weather Protection
Every evening, thousands of single cab utes sit exposed across South Africa. Their loads face thunderstorms, dust, and theft. Fitting single cab aluminium canopies changes that reality. I have watched a single night of Highveld hail ruin tools left in an open load bed.
The canopy creates a sealed, lockable volume where your gear stays dry and out of sight. Consider the threats it answers:
- Summer thunderstorms that drench cargo in minutes
- Opportunistic theft from unattended load beds
- Relentless sun that cracks and fades equipment
Security comes from solid construction and locking mechanisms that deter casual break-ins. Single cab aluminium canopies offer a level of protection that soft covers cannot match. Weather protection comes from the rubber seal along the tailgate, which keeps dust and water out even on gravel roads. For anyone who works from their ute, this transforms the vehicle from a utility machine into a dependable partner.
Improved Versatility for Work and Leisure
Once you fit single cab aluminium canopies, the ute stops being a single-purpose machine. I have seen the same load bed carry fencing posts on a Monday and a cooler box, tent, and gas stove by Friday. That shift happens without swapping vehicles or removing panels.
The interior rails and tie-down points allow for modular storage. You can mount drawers, toolboxes, or a fridge slide without drilling into the body. The canopy’s flat roof accepts roof racks for longer items like ladders, fishing rods, or a rooftop tent.
Consider the flexibility:
- Swap between work loads and leisure loads in minutes
- Keep dirty tools separate from clean camping gear
- Mount accessories without permanent modifications
For the weekend fisherman, the canopy hides the smell of bait and the mess of tackle. For the contractor, it means arriving on site with every tool accounted for. The same vehicle serves both lives without compromise.
Weight Advantages Over Steel Alternatives
Steel canopies add serious mass to a bakkie. Single cab aluminium canopies tip the scales at roughly a third of their steel counterparts. That difference matters on gravel roads where every kilogram affects braking distance and tyre wear. A lighter canopy means a lower centre of gravity, which translates to more predictable handling when the bakkie is loaded. It also preserves payload capacity, so the weight saved goes into the load bed instead of the chassis. Consider the practical effects:
- Reduced fuel consumption on long trips
- Less strain on rear leaf springs
- Easier to remove and refit when needed
The suspension still does its job. It just does not have to do it for an extra fifty kilograms of steel. When you fit single cab aluminium canopies, you are not adding a permanent anchor to the chassis.
Positive Impact on Resale Value
Few upgrades signal care like a well-fitted canopy. When you eventually sell, a bakkie with a single cab aluminium canopy presents differently in photos, in person, and in the buyer’s mind. The load bed stays protected from rust, dents, and UV wear, which means the bodywork tells a better story.
Prospective buyers often factor replacement costs into their offers. They know that adding a canopy later is an expense, so seeing one already fitted simplifies their decision. It also broadens your market, since many buyers search specifically for single cab aluminium canopies when browsing used utes. That quiet advantage can shorten the time your bakkie spends on the market and firm up your asking price. The canopy remains visible proof that the vehicle was treated well.
Key Features to Evaluate Before Purchasing
Material Thickness and Corrosion Resistance
Measuring alloy thickness is the first honest test I run on any canopy. Most budget options use 1.2 millimetre sheet, which feels flimsy under a knuckle. Stronger builds use 2 millimetre aluminium for side panels and 3 millimetre for the floor. That extra material prevents oil canning and resists denting from highway stones!
- Temper designations like 5083 or 5052 indicate marine grade and better salt resistance.
- Corrosion warranties often exclude welds and fasteners, leaving hidden weak points.
Corrosion starts where components join, under rivets or inside folded seams. Single cab aluminium canopies with stainless steel hardware and a powder coated interior outlast those without. Drainage channels must be sealed; trapped water accelerates galvanic reactions. Your canopy’s lifespan depends on these hidden specifications, not the gloss of its paint.
Locking Mechanisms and Anti-Theft Design
A bakkie is stolen every 15 minutes in South Africa. I inspect the canopy lock before anything else. Thieves attack the latch, not the glass. Single cab aluminium canopies with a flimsy paddle lock take seconds to breach. Strong builds use concealed triple point latching and hardened steel strike plates. Check these points:
- Lock cylinders with rotating guards against drilling
- Recessed hinges that cannot be pinned out
- Striker plates bolted through the aluminium, not riveted
The best examples integrate with your vehicle’s central locking. That convenience has a cost. A dead battery locks you out. I always demand a mechanical key override. Electronics fail at the worst moment. A basic deadbolt adds meaningful delay. Your goal is to make the canopy less inviting than the next one.
Window Configurations and Ventilation Options
The window layout dictates how your canopy breathes. In the South African sun, a sealed canopy builds intense interior heat. I look for sliding windows with mesh screens, rather than plain glass panes. These allow crossflow ventilation while keeping dust out on gravel roads.
Consider the opening style. Sliders are practical, but hinged windows offer a wider aperture. Check if the glass is tinted or laminated. UV protection matters here.
For airflow, a decent setup includes:
- Roof vents with rain channels
- Sliding side windows with insect screens
- Optional rear window hatches for loading access
The best single cab aluminium canopies balance visibility with airflow. Poor window placement creates blind spots. Good ventilation prevents interior condensation and keeps tools dry. When comparing single cab aluminium canopies, examine the window seals carefully.
Integrated Racking and Storage Solutions
Your load bed is a void where spanners vanish. Integrated racking turns that void into a controlled environment. Before buying, measure your gear. A canopy with built-in shelving might look clever, but if the bins are too shallow for your drill cases, you have wasted money.
Check the racking’s mounting system. Does it bolt to the canopy or the bakkie’s chassis? Chassis mounting transfers weight better. Look for adjustable shelves. Fixed racks limit future cargo. Also, consider the finish. Powder coating resists scratches. Galvanised steel lasts longer in coastal air.
- Load rating per shelf
- Access from both sides or only rear
- Ease of removing racks for bulky loads
Integrated storage must not block the canopy’s windows. Rear vision is precious. The best single cab aluminium canopies offer modular racks that fit around existing openings, not against them.
Compatibility with Existing Ute Accessories
Your bakkie already carries investments beyond the cab. A canopy that forces you to discard those accessories creates hidden costs. Before committing, measure your load bed with existing fixtures in place. A canopy designed around standard track systems preserves your current setup.
- Check whether the canopy accommodates existing tie-down rails
- Confirm clearance for toolboxes mounted along the bed rails
- Verify if tonneau cover tracks interfere with the canopy seal
Some single cab aluminium canopies integrate with factory-fit accessories, while others demand removal. That distinction matters. The right canopy works with your ute’s existing geometry, not against it. Mounting points and bolt patterns determine whether your current accessories remain usable. A good fit means your accessories stay functional and your canopy performs its role.
Aluminium Canopies vs Alternative Materials
Aluminium vs Steel – Strength and Weight Trade-Offs
Steel bends before it breaks, but that resilience comes with a price. Single cab aluminium canopies use aerospace-grade alloys that offer a different kind of toughness. These canopies withstand daily abuse without demanding a heavier suspension setup.
The real trade-off lies in how each material handles stress. Steel transfers every shock directly to your ute’s mounting points. Aluminium flexes and recovers, which reduces strain on the cab and chassis. For farmers carrying light but bulky gear, aluminium wins. For contractors hauling dense, heavy loads, steel remains the safer bet.
- Aluminium’s elastic modulus permits controlled deformation.
- Steel’s rigidity prevents flex but accelerates fitting fatigue.
- Properly engineered aluminium outlasts steel in high-vibration environments.
Your choice depends on your payload’s weight and your driving terrain. I’ve watched both fail and succeed; know those variables before you commit.
Aluminium vs Fibreglass – Durability and Customisation
Fibreglass canopies have one undeniable advantage over aluminium: they do not corrode. Salt air, chemical fertilisers, and relentless coastal moisture leave gel coat surfaces largely untroubled. That same surface, however, is a double edged sword. A fibreglass canopy’s outer shell is a gel coat layer, and once that layer cracks, moisture creeps beneath it. The resulting osmosis blisters and delaminates the structure from the inside out.
Aluminium presents a different problem. It does not rot or blister, but it requires proper grade selection and correct installation to avoid galvanic corrosion at the mounting points. This is where single cab aluminium canopies excel. The material can be extruded into complex profiles, welded cleanly, and machined to exact tolerances. That flexibility means a canopy can be tailored to a specific cab shape without the need for a costly mould.
Customisation is where the two materials part ways completely. Fibreglass is cast from a mould; every unit is identical until aftermarket cutting and filling occurs. Aluminium is fabricated. Access panels, internal tie down rails, and roof racks are integrated during manufacturing, not glued on afterwards. I have seen fibreglass canopies crack around poorly sealed accessory mounts. I have also seen aluminium canopies carrying awkward loads with only minor surface scuffs.
When assessing your needs, consider these factors:
1. Check for UV inhibitors in the gel coat, as cheap fibreglass fades within two years in the South African sun.
2. Examine the internal frame, as some fibreglass canopies rely on heavy timber cores for structure.
3. Position your mounting brackets over reinforced aluminium sections to prevent flex fractures.
A fibre glass shell weighs less than a steel tray but carries hidden mass in its layered construction. Single cab aluminium canopies offer you the ability to modify, repair, and reconfigure your setup for decades. Fibreglass gives you a sleek, smooth finish that resists dents, but repair requires skilled layup work and careful colour matching. For a working vehicle, the ability to weld a new bracket or rivet a replacement panel is worth more than a perfect gloss finish.
Aluminium vs Canvas – Security and Longevity
A canvas canopy is a cover, not a vault. For R8,000 you get weather protection and a zipper that yields to a R20 box cutter. South African thieves know this. Your cargo becomes their cargo within seconds.
Canvas also decays in months. Sun, rain, and mildew attack the fabric. Stitching rots, zippers jam, and you pay again for replacement. Single cab aluminium canopies solve this with extruded frames and proper locking systems. They survive roadside branches and harsher UV, lasting longer than the vehicle itself.
The five year cost is simple:
- Two canvas replacements: R16,000 plus stolen goods.
- One quality aluminium canopy: R25,000 with zero theft claims.
Single cab aluminium canopies make arithmetic sense.
Long-Term Cost Comparison Across Materials
The upfront price tag rarely tells the whole story. A steel canopy might save you R3,000 at the dealership, but then the rust starts. Sandblasting and respraying every few years eats that saving quickly. Fibreglass cracks under heavy farm loads, and repairs need specialist attention that costs more than you expect.
When I work through five year ownership costs, single cab aluminium canopies still come out ahead. There is no paint to maintain, no corrosion to treat, and no structural repairs from UV damage. The material simply does not degrade the way alternatives do, which means your money stays in your pocket rather than going back to the fitment centre.
- Steel: R18,000 purchase, R6,000 in rust treatment and resprays over five years
- Fibreglass: R20,000 purchase, R4,500 in crack repairs and UV protection
- Aluminium: R25,000 purchase, R0 in maintenance
That zero in the last row is what makes single cab aluminium canopies the sensible long term choice for South African conditions. The initial outlay is higher, but the cost curve flattens out while other materials keep taking from your monthly budget.
Step-by-Step Installation and Fitment Guide
Preparing Your Ute Tray Surface
A loose fit ruins even the best single cab aluminium canopies. Before you mount anything, the tray surface demands attention. I start by scrubbing off every trace of dirt and oil. Then I inspect for rust or dents. Any imperfection compromises the seal.
For the actual prep, follow this order:
1. Wash the tray with a degreaser and let it dry completely.
2. Sand down raised edges or old paint.
3. Wipe the surface with a tack cloth.
Next, apply a butyl rubber sealant along the perimeter. This keeps water out! Position the canopy, but do not tighten fully. Check alignment at every mount point. Adjust until the gaps look uniform. Finally, clamp and tighten to factory torque specs. A proper fit takes an hour, but it saves years of rattling and leaks. Single cab aluminium canopies only perform when the tray surface is level and clean.
Tools and Equipment Required for Installation
Fitting a canopy correctly demands a torque wrench and a socket set; everything else is just detail. The essentials are:
- Stainless bolts and washers
- Aluminium-compatible sealant
- Spirit level
- Rubber mallet
Start with a helper to lift the canopy. Position the front edge against the cab, then lower it onto the tray. Leave the bolts loose. Measure diagonals with a tape; any difference past 5 mm means shifting the canopy. When the gaps look even, torque each bolt gradually from the centre outward. Finish by sealing the bolt heads. A careful hour now ensures your single cab aluminium canopies hold firm on rough roads.
Securing the Canopy Base and Mounting Brackets
The canopy sits on the tray, looking innocent. Now secure the base before it gets ideas. Mounting brackets must sit flush against the underside and the tray rails. If they rock, use flat washers as shims. A twisted tray is common. Fix it with shims, not extra torque.
Work the bolts in this order:
- Front left and front right, finger tight.
- Rear left and rear right, finger tight.
- Recheck the gap between canopy and cab.
- Torque from the centre outward, then recheck.
Single cab aluminium canopies shift when the base is not level. The brackets carry the load, but only when the base transfers it evenly. A rocking canopy will loosen every bolt over time.
Aligning Doors, Seals, and Hinges
Alignment makes or breaks a canopy’s weatherproofing. A misaligned door will let dust in and wind out. For single cab aluminium canopies, the process starts with the hinges, not the seal. Loosen each hinge bolt a quarter turn. Close the door and feel for resistance. The latch should catch without slamming.
Work in a logical order:
- Inspect the door gap from top to bottom.
- Shift the hinge plate using a rubber mallet, not force.
- Recheck the seal compression along the full perimeter.
Once the door sits flush, tighten the hinge bolts. Then test the seal with a strip of paper. Pull it out. If it slides too easily, adjust again. Hinges wear, so recheck every six months!
Weatherproofing and Final Adjustments
The real test of single cab aluminium canopies is not how they look on the showroom floor, but how they survive the first thunderstorm on the N1. Installation is where most headaches begin. Start by placing the canopy on the prepared tray, then work through the mounting sequence.
- Fit the rubber strip along the tray edge to create a primary moisture barrier.
- Lower the canopy and check the gap between the front of the bin and the cab.
- Torque the mounting brackets from the centre outward to avoid warping.
Once the base is secure, apply a polyurethane sealant along the bolt holes and tray seams. Leave the canopy to settle for 24 hours before adjusting anything. Final adjustments involve rechecking latch pressure and verifying that the rubber gaskets compress evenly. A properly installed single cab aluminium canopies should sit level, with no visible stress marks on the brackets.
Common Installation Pitfalls to Avoid
Installation rewards patience. Begin by lowering the single cab aluminium canopies onto a clean tray, then measure the gap between the bin and the cab. This measurement dictates everything that follows, so take it twice. I always recommend a helper for this stage.
Torque the mounting brackets in stages, from the centre outward. The common pitfalls tend to surface here:
- Snugging one corner fully before the others, which warps the frame.
- Ignoring the rubber strip, which invites moisture later.
- Over-tightening bolts until the aluminium dimples.
Walk around the vehicle and check each latch before moving on. A canopy that sits level on day one will serve you for years.
Maintenance and Longevity Tips
Cleaning Methods to Prevent Aluminium Corrosion
Aluminium corrosion begins the moment its protective oxide layer is breached. In South Africa’s coastal zones, salt-laden air accelerates the process, and the only effective defence is a disciplined cleaning routine. Your single cab aluminium canopies will outlive the chassis if you respect that invisible oxide layer. It stops oxygen from reaching the metal beneath. Harsh detergents and steel wool destroy it within seconds.
Use pH-neutral soap and a soft microfibre cloth. Rinse with low-pressure water to avoid driving grit into the seals.
- Wash every two weeks in coastal regions, monthly inland.
- Dry with a chamois to prevent water spot etching.
- Apply automotive wax twice a year to seal micro-pores.
Avoid pressure washers near window frames; they force moisture past the gaskets. That trapped dampness corrodes from the inside out. The reputation of single cab aluminium canopies for longevity rests on these small, consistent habits.
Lubricating Hinges, Locks, and Sliding Mechanisms
Nobody notices a hinge until it starts grinding. The lock barrels, pivots, and sliding tracks on your single cab aluminium canopies carry the full weight of South African conditions. Karoo dust grinds. Coastal moisture corrodes.
Three points demand attention:
- Hinge pins at the door frames
- Lock barrels and striker plates
- Sliding window channels
Dry PTFE lubricant outperforms oil. Oil collects dust and turns into a grinding paste within a week. Firearms grease clings to lock tumblers and resists washing out during rain. I trust this combination on my own canopy.
Seals need separate attention on single cab aluminium canopies. Silicone paste on a cotton bud keeps rubber supple and stops windows sticking. A neglected track will tear a gasket on the first cold morning. Then you’re sourcing replacement seals for a problem that took two minutes to prevent.
Inspecting Seals and Rubber Gaskets Regularly
Karoo sunlight degrades rubber faster than most owners expect. The UV index at altitude accelerates oxidation in the gaskets around your single cab aluminium canopies, turning flexible seals into brittle channels within three years.
In my experience, inspection requires more than a glance. Run a finger along the inside lip of each seal. Cracks hide on the underside where the rubber folds against the aluminium frame. Check the corners where seals meet, because shrinkage pulls them apart first.
- Permanent compression marks where the rubber no longer springs back
- Brittle sections that crack when pressed between thumb and finger
- Blocked drainage holes at the bottom of the door frames
Replacement seals cost less than repairing water damage inside a load bin. A failing gasket announces itself with whistling at speed, and that noise is the first warning you can act on before moisture reaches the cab.
Repairing Scratches and Minor Impact Damage
Scratches on single cab aluminium canopies are part of life on South African gravel roads and busy work sites. The protective oxide layer takes the brunt, but once breached, bare metal sits exposed to moisture and coastal salt. Small dents from shifting loads or flying stones deserve attention before they become stress points.
Start a repair by cleaning the damaged area with a degreaser, then use a fine abrasive pad to remove burrs. For surface scratches, matching aluminium touch-up paint or clear lacquer seals the metal. Deeper gouges call for a two-part metal filler, sanded flush and painted.
When assessing impact damage, look for distortion beyond the obvious mark:
- Hairline cracks radiating outward from the impact point
- Subtle bowing across the canopy panel
- Loose or compromised rivets in the surrounding frame
Shallow dents often push out from behind with a rubber mallet and a flat backing plate. Deeper creases may need a professional panel beater. Early intervention keeps single cab aluminium canopies structurally sound and weathertight.
Budgeting, Costs, and Insurance Considerations
Average Price Range for Quality Canopies
Prices for quality single cab aluminium canopies range from R8,000 to R30,000. That gap mirrors the aluminium gauge, the locking mechanisms, and the precision of fitment.
Budgeting should include more than the canopy itself. Fitment labour adds R1,000 to R2,500, while delivery from workshops in Gauteng or the Western Cape can reach R800.
Insurance is where owners get caught out! Most comprehensive policies cover fitted accessories only up to R10,000, rarely matching what quality single cab aluminium canopies fetch in the aftermarket. Declare a higher replacement value and your insurer raises the premium. Declare less and you carry the shortfall.
Points to raise with your broker:
- Replacement value at the time of purchase
- Whether theft requires a police case
- If coverage applies when parked overnight
- The effect on your monthly premium
A R25,000 canopy left unrecorded is effectively uninsured. I have watched owners learn that the hard way.
Factors That Influence Canopy Pricing
The real cost of single cab aluminium canopies isn’t the R25,000 sticker. It’s the R18,000 you discover when your insurer shrugs after a theft. A canopy is an accessory until it’s a claim, and then it’s a mystery.
Fitment labour and delivery turn budgeting into a Choose Your Own Adventure book, one where every path leads to a small invoice. Owners often compare quotes without tallying these extras, which is like measuring a ute’s load bay with a short tape measure.
Insurance policies have a peculiar habit of covering fitted accessories up to R10,000. That’s roughly the price of a decent canopy lock set, or four good tyres. Single cab aluminium canopies, with their gauge and locking precision, regularly outstrip that figure. So, declare the correct replacement value.
Things to confirm with your broker:
- Replacement value on the day of fitment
- Whether theft requires a police case
- Coverage while parked overnight
An unrecorded canopy is a solitary expense. The premium difference is usually small; the shortfall after a claim is not!
DIY Installation vs Professional Fitting Costs
Choosing between DIY and professional fitment for single cab aluminium canopies often hinges on your tolerance for fiddly work. A self installation saves on labour, but misaligned doors and leaking seals can cost more to fix later. Professional fitters charge between R1,500 and R3,000, which buys correct torque, sealing, and alignment.
Your budget must stretch beyond the canopy’s sticker price. Fitment hardware, rubber profiles, and delivery fees appear after the quote. I recommend adding 15% to any price you’re quoted, because that figure covers the small items nobody mentions upfront.
Insurance complicates the cost. Standard policies cap accessory cover at R10,000, while quality single cab aluminium canopies often exceed that. You need to confirm:
1. The replacement value on the day of fitment
2. Whether theft requires a police case
3. Coverage while parked overnight
That shortfall after a claim is the true cost of skipping the paperwork.
Does an Aluminium Canopy Affect Your Insurance Premium?
Adding a canopy changes your vehicle’s risk profile. Insurers see single cab aluminium canopies as both a protective measure and an added asset. The canopy hides your load from view, reducing theft risk, yet the canopy itself becomes a target for thieves. For owners of single cab aluminium canopies, the premium impact varies wildly between insurers.
Here’s where the calculation shifts. Some insurers offer a small discount for added security. Others charge a nominal fee for the increased replacement value. I’ve seen these balance out to almost nothing! The real cost appears at claim time.
- Declare the canopy as a modification, not an accessory
- Confirm the agreed vehicle value includes the canopy
- Ask whether theft of the canopy alone is covered
South African insurers treat fitment inconsistently. One policy raises your premium by R200 per month. Another leaves it unchanged. The only certainty is that failing to declare the canopy voids your cover.
Warranty Coverage and After-Sales Support
Budgeting for single cab aluminium canopies requires a view beyond the sticker price. Fitment costs, insurance adjustments, and future maintenance all factor into the true expense. A quality canopy from a supplier with proper warranty coverage protects your investment, though cheaper options often carry thin after-sales support.
Typical warranty inclusions cover several areas:
– Corrosion and material defects
– Seal and hinge replacements
– Locking mechanism failures
Insurance considerations intersect with warranty coverage. Theft damage triggers your policy, while wear-related failures belong to the warranty. A supplier who honours their obligations prevents hidden costs from landing on your account.
South African buyers must weigh these expenses before committing. The difference between a canopy with solid after-sales support and one without it becomes visible after years of use. Single cab aluminium canopies from established suppliers often carry a higher price, yet their warranty structures alter the long-term financial picture.


0 Comments